Showing posts with label diy. Show all posts

Sunday, April 26, 2020

How to Draw Rowlet


These days it is rare for Winston to be seen without his Rowlet cuddled up with him. Rowlet is his favorite Pokemon character.  It's not uncommon to hear him say "Don't you think he's just so cute?!" 😂 

Thursday, November 5, 2015

Popped Corn on the Cob Craft

Next to "Mommy, I love you!" and "Mommy, will you play with me?" my one of favorite things that Winston says is "Mommy, let's make a craft!"  It can be something as simple as cutting paper and gluing it down to making a sticker creation to something that has been pre-planned.  
This week we made corn on the cobs with popped corn!  

For this craft you will need:
Popped corn {We used kettle corn because was the less buttery option in our pantry!}
Yellow construction paper
Green construction paper
Glue
As you can see, I did not use any certain template for the corn and leaves.  One thing that doing crafts with Winston has taught me is that everything doesn't have to be perfect, just fun!  Once the leaves were glued onto the yellow blobs, they looked more corn like!

This was the perfect craft to do around snack time!  We would say, "One to eat and one to glue!  One for me and one for you!"  
If you use Elmer's glue, note that it does take a good sized blob to get the popcorn to stick.  In order to make the popcorn last a little longer, I suggest spraying it with a clear coating.  Once the corn on the cobs dried, I glued popsicle sticks to the back and put them in a vase as a decoration!  

Happy Crafting!

Saturday, June 13, 2015

Guest Post: Vintage Neon Turned Marquee Lights

Y'all, I am happy to say that the love of my life has written a post about our Shine Marquee letters!  I hope you enjoy!
A special How To written by Benjamin

We have a ledge in our entry way that is super high and perfect for decorating!  When the house was being built we added an electrical outlet up incase we would want to do something with Christmas lights someday.  During one of our house brainstorming sessions, Sara and I decided that marquee lights would be the perfect thing for that space.  Picking the word Shine was an easy choice.  It seemed like a fun reminder to let our Light shine on a daily basis.

The next day we went to a local place that Sara said sold just what we were looking for: The Happy Peddler in Old Town Spring.  When you walk in you can't miss the letters hanging from the ceiling, resting in the corners, and cascading down the walls in all different fonts, colors and sizes.  Knowing what letters we were after before walking into the store helped keep us from feeling overwhelmed by the selection.  We found an "I" and an "E" that we really liked and as we were waiting in line to hear the prices on them we saw a huge "N" sitting by the counter.  We started chatting with Adam, the owner, and he said he currently had way to many "N's" and we could have this one for $50 if we took it with us today.  Without hesitation we said, "Great!"  We told him we would be needing an "S" and "H" and he said to keep checking his Facebook page because he updates it when new shipments of letters arrive from the scrap yard.  Within the next few weeks we had found an S, but we were still on the hunt for an H.  Tracking letters down like this over the internet proved to be a difficult and very expensive task, with many places wanting hundreds of dollars for the larger letters.  A month or so later I called Adam who said he had a shipment of letters on the way and there was one large H in it.  We scooped it up and could continue with the project.

Since the letters we purchased were old neon letters with no bulbs, we debated how to light them.  We could use neon lights or marquee bulbs.  Many of you know that I love woodworking, but what you probably don't know is that I have a fascination with glass work.  I keep telling Sara that I want this to be my next hobby and she is always quick to remind me that I don't have enough time for all of my current hobbies so the last thing I need is a new one.  I have watched numerous shows on PBS and the History Chanel on glass blowing and thought blowing new glass for neon would be a fun adventure, but Sara was able to convince me that LED bulbs were a smarter choice for this project.

We thought LED globe lights would be nice because they look like vintage marquee lights but are much more energy efficient.  Thankfully Amazon stocks lights like we were looking for year round, and they even had them in varying string colors, hues, and wattages.  We ultimately decided on 5 watt G40 bulbs for the job.  With the bulbs on the way it was time to get the letters ready.

Winston helped me give all the letters a good wash down.  Many of them had been sitting outside or in scrapyards for years, so before we hung them up I wanted to make sure all dirt and critters were gone.  Winston and I tapped out a few large dents but made sure to leave character to each letter. Over the years the letters had all been painted different colors that we thought looked nicely together.  I touched up any areas that had chipped or scratched so that everything would pop.
Next I flipped the letters on their faces on my workbench and marked on the back with a Sharpie where the bulbs should go, making sure to put the bulbs around 6 inches apart.
I then used a 1/8 metal cutting bit to start a small pilot hole for each bulb.  Last year for Christmas my sister and her husband had given me an assortment of drill bits.  This step bit was part of that assortment and   proved to be a perfect bit for the job.  After discerning the proper step I buzzed out 125 holes to make room for the lights.  Working with metal can be a dangerous task, as high temperature pieces of sharp objects are flying in all directions.  Be sure to wear eye protection and close toed shoes while doing nay sort of metal working.  Also, sweeping up the shop immediately afterwards is a must if you share your shop with a toddler like I do.
With the holes drilled and filings cleaned up, it was time to string in the lights.  I avoided stringing multiple letters together until they were up on the wall to help make hanging them an easier task.  After trying to scale an extension ladder while holding a 40 pound letter and a drill gun I quickly realized just how high a 15 foot ledge can be.  I decided that to safely hang the letters I would need scaffolding or a scissor lift.
Give any guy the choice of lugging and assembling scaffolding or driving around a scissor lift and the decision is an easy one.  Thankfully SunBelt Rentals carries a lift that was exactly 1/2 inch smaller than our doorway and proved perfect for the job.  A few quick tips about renting one of these babies: most rental places offer daily rates and are closed on Sundays.  This means you can pick it up at the very end of the day on Friday or first thing Saturday morning and you don't have to return it until Monday at 7:00 with just a single day's rental fee.  Also, they are only front wheel drive, so getting them over a threshold or up and down a ramp can be tricky, so plan accordingly and have plenty of extra lumber on hand if needed.  They will charge you for the lift, a trailer to tow it with, and the chains to secure it to the trailer.  If you call ahead you can likely negotiate a package deal, especially if they have multiple units available to rent that day.  Even Sara wanted to take the lift for a spin!
After getting the lift home and finagling it into the house, hanging the letters proved to be an easy task.  We spaced them on the floor and then took them up one at a time in the lift and fixed them to the wall.  Since the bulbs stuck out just over an inch from the back of each letter, flush mounting them was not an option.  I had scrap 2x4's that I cut into 4 inch pieces and secured into studs in strategic places along the wall.  I then screwed the letters into the blocks to anchor them on the wall and hide the 2x4's from sight.
Since the sign is just over 3 feet by 7 feet in size, we ended up using 5 strings of lights with 25 G40 bulbs rated 5 watts each.  To prevent electrical fires each string of lights has a small fuse in it that I did not want to overload.  To avoid constantly getting the ladder out to change fuses, I daisy chained three strings together in one outlet and two strings together in another.
The project turned out every bit as well as we had hoped.  The letters provide a gentle glow each night that helps create a nice ambiance in our entryway and takes advantage of a space too high for virtually any other purpose.  Special thanks to Adam at The Happy Peddler for his help in tracking down all of the letters.  Also, thanks to Winston for helping me clean and hammer out each of the letters.  Last but not least, thanks to Sara for keeping her cool when I nearly got a 3000 pound scissor lift stuck in our doorway and for constantly guiding but never standing in the way of my DIY spirit.

Friday, February 13, 2015

Five on Friday

{one} 
The weather here in Houston has been fabulous all week which means spending time outside in the afternoons!  There has been water table playing, lots of sandbox playing including digging and moving dirt, and playground time.  I am thankful that we have been able to see the sun and soak up some Vitamin D!
{two}
Husband and I went on a mid-day lunch date.  We both love Chuy's but Winston isn't the biggest fan. When we have lunch out together just the two of us that is normally our go to place!  I am thankful that we are afforded the opportunity to have the time together just the two of us.  We adore having Winston with us but it is good for us to get back to being just two every once in a while.  
{three}
One of our projects on the to-do list for February was install new light fixtures and frame the bathroom mirror.  Major kudos to Hubby {and our friend Brian} who worked to make the goal a success!  When we moved into the house the only light over the bathroom mirror was a builders grade light with three bulbs.  Sad.  We found these amazing fixtures and promptly purchased the 5-bulb replacing the old one the same day.  It was amazing!  Then we took a step back and decided we needed to add a 3-bulb fixture over each sink.  The amount of light we now have in the bathroom is fantastic and I love being able to really see when I get ready in the mornings.  Framing the mirror also completely changed the look of that side of the bathroom.  We just love how it looks and are making plans to do the same to the spare bathroom.  Our master bathroom is almost complete, just one wall that looks kinda sad and we have plans for that too!
{four}
We have been invited to a black-tie {optional} wedding.  I have yet to attend to a black tie event and am excited to get all dolled up!  I'm not really digging a long formal dress so I thought I might wear and long skirt like one of these from Shabby Apple {1 || 2 || 3 || 4} with a top and some statement jewelry pieces.  What do you think?  Would that be acceptable?  Have you ever been to a black tie event before?  Which skirt is your favorite?
{five}
Wishing you a very Happy Valentine's full of lots of love from the special people in your life!  

ball || smile shirt

Hooking up this week with the girls of Friday on Five and Oh, Hey Friday!

Wednesday, February 4, 2015

Personalizing the Pillars

When we picked our house plans, we really liked about the openness of the downstairs living area.  The bar is situated in the middle of the rooms which I like because I can be in the kitchen working on dinner while Winston plays with cars or in his own kitchen.  There are two pillars on either side of the bar.  We had extra outlets put in so that we could use appliances on the counters.  

We are still in the process of personalizing our house {I mean, who isn't?} and these pillars are the next things for me to tinker with.  I am happy with the way the first one has turned out and am excited about adding new things as we create them or get them from our travels!
The 2015 sign idea came to be in January.  You know I love a hand and foot craft.  I think they are the best way of capturing how little {or big!} the tiny people in your home are.  I used a pre-cut wood piece from Michael's.  JoAnn's also carries them.  Using black paint, I painted the face of the wood leaving a boarder to see that wood grain.  Winston was more than happy to squish his hand and foot into white paint for the 15 part of the sign!  I then hand painted the 20 and voila!  A cute, personalized 2015 sign!

Wreath: The Magnolia Market \\ similar 
Squirrel: Primitives by Kathy \\ I purchased mine at Nordstrom but it can be found here and here.
The lily of the valley photo and the drawing of Union Street are souvenirs from travels to Aberdeen.  

Tuesday, January 27, 2015

DIY Penny Cornice Board Window Treatment

I like to decorate with unique and different things.  Thankfully I have a husband who doesn't mind indulging my out of the ordinary requests.  When we started putting together ideas for our new house one of them was to make something using pennies.  We've all seen the Pinterest pin with the people gluing pennies onto a floor...
I looked at that and thought, "Well, gluing pennies to a floor seems crazy...  but I could probably glue pennies to something else!"  So I did a broader search and found loads of ideas for using our one cent friends.   Everything from bird houses, to vases, to countertops and tables.  Since we didn't need a bird house and we liked our countertops, Benjamin and I put the idea on the back burner.  Until one evening when I was thinking about our master bathroom.  Then it hit me, a cornice board covered in pennies could be cool!  The tile in our bathroom would match nicely to the copper tones of the penny and I wanted to redo the window treatment we had in there.  I pitched the idea to Benjamin and he agreed we could make it possible.

After several nap times of work, 8 tubes of E6000 glue, and $30 in pennies, our window treatment was complete!
Here's how we did it
After determining how big the cornice board needed to be we picked a design that would complement shape of the penny.  The scalloped edge was just the right amount of elegance {are pennies elegant?!} that I wanted to have.   Using a 1/2" MDF board, Benjamin cut out our design with a jig saw.  He freehanded the scallops but you could also use a bowl or a lid to create an outline of the size you want.  We used the MDF instead of plywood since this was going in our bathroom and MDF tends resist humidity better.  
Then we spray painted the MDF copper so that the gaps between the pennies wouldn't be that horrible beige color.  Once it was dry, we brought it inside for me to start gluing.
We decided to do two layers of pennies to add dimension and character to the window treatment.  It also allowed for me to cover up the gaps between the pennies when they laid side by side.  We used E6000 as our adhesive of choice.  
We started out with $20 in pennies and ended up using $30 worth when it was all said and done.  I put the pennies in a small bowl so that I could sort the nice ones from the super nasty ones.  I used both the fronts and backs of pennies, new and old.  I liked using the ones that were smashed and dented, the ones that had oxidized and had colorful markings on them.  A reminder that even though we may have a few dents ourselves, we still have value.  {Deep for a penny diy, huh? :)} 
As I said previously, it took 8 tubes of E6000 to complete this project.  And I glued every one of the 3,000 pennies myself.  Benjamin tried to help but then decided it was just a one person job!  He was my go to guy for woodwork and hanging the window treatment.   After all of the pennies were glued on, the board was hella-heavy!  
I love the way that the cornice board turned out!  The colors and tones match splendidly with our tile and I even found some soap dispensers from Home Goods that compliment every thing really well.  It's definitely something unique. 

Things I learned with this project
  • There is such a thing as black E6000... did you know know this?  We used the clear E6000, which is found in the jewelry making department.
  • The strange hand cramp you have a few hours later is indeed from squeezing the tube of glue...not from over texting!  
  • That there are wheat pennies from 1932 still in circulation!  I found 8 wheat pennies ranging from 1932 to 1957.  We saved those ones for Benjamin's coin collection.  Gluing them to a board just didn't seem right. 
  • Did you know that some of the backsides of the penny have pictures of Abe Lincoln chopping wood or his home on them?  It was news to me! 

Items used in this DIY Project
1/2" MDF  (more resistant to humidity than standard ply wood)
Jigsaw
Nail gun
Copper spray paint
Pennies.  Lots and lots of pennies!
Clear E6000
Brackets + screws to hang the completed cornice board
Total cost of the project was about $80 {including the rolls of pennies}

If you should feel so inspired to Penny Everything, here are 25 other cool ideas!

Wednesday, October 29, 2014

DIY Dinosaur Hat Rack

As you may or may not already know, Winston truly loves to wear hats!  It was something we started when he was first newborn.  He enjoys wearing them while we are around town and to school.  His hat collection has been taking over the closet floor for some time now.  And since we are trying to teach him to put away his shoes and hats, it was decided he needed a designated area for his fancy headwear!    

Knowing that we wanted dinosaurs, we ordered a set of Mini Dinosaurs from Amazon.
Using poplar strips that were 1" tall by 1/2" thick, Benjamin sawed them down into 3 feet sections.  Then he choose a to paint them green using spray paint we already on hand.  While the sticks were drying, he sawed 16 of the dinosaurs in half using a band saw.  
After the boards were dry,  Benjamin drilled a pilot hole into the wood using a 1/8" drill bit as well as partially into the half of the dinosaur that would be hanging from them board.  Using a 1" size 6 wood screw, he attached the dinos to the boards.
We then took them to the closet, did a rough measure of the distance by holding up one hat to make sure there was enough space between the two rows and screwed them into the wall.
Buddy loved seeing the dinosaurs asking what each of them were while taking hats on and off the rack!  It has been a fabulous addition to his closet.  Speaking of which...I think we need to add a new row as all of the dinos are currently occupied!!

Total Cost of Project: Less than $25!!

You will need:
Dinosaurs
Poplar Wood Strips
Screws
Spraypaint

Tools Needed:
Bandsaw
Screw gun

Monday, September 29, 2014

Pumpkin Decorating: Metal Mouth

Last year was our first year to participate in the Annual Staff Pumpkin Decorating Competition at Todd Hughes Orthodontics.  Benjamin created this fabulous Cheeseburger and came in first place!  This year we had quite a few ideas floating around in our heads but decided to create something a little more simple this year.  Basing this off of our Domo Arigato pumpkin we made years ago we created this!!  I give you, Metal Mouth!
We liked the idea of Metal Mouth as a play of the nickname that kids give other kids with braces.  We started with an orange pumpkin and Benjamin sprayed him with a coat of silver spray paint to give him the metallic appearance.

For embellishments, we used items that can be found in the aisles of all hardware stores!  We picked items that would work best for the look we were trying to accomplish.
Grab a few L-brackets, a hinge, some lag bolts, corner braces and anything else that looks cool!  Get your screw gun and go to town!
We hot glued Googlie eyes and screwed in everything else.
 Three hands may be necessary to position, stabilize, and screw the appropriate pieces into place.
And then, TADA!  Your very own Metal Mouth or Robot pumpkin!  

The cost of this project is the foam pumpkin (that you can purchase at local hobby stores for $10+) plus about $10 worth of hardware.  It is an easy project for kids to make with parent supervision...or two grown adults to make with child supervision!

Can you believe October is days away?!?!

Wednesday, August 27, 2014

House a Home: Craft Room Dot Wall

In our house, we opted for the "Playroom Addition" floor plan because we knew that it would be nice to have a space where I could store supplies, wrapping paper and get crafty with the kiddos!  In searching for inspiration on how to decorate this room, I came across Oh Happy Day's Dot Wall.  I was smitten and knew that I wanted one of the walls in the room to be a happy rainbow of dots!

Oh Happy Day used potatoes and acrylic paints for their wall.  We decided to stencil circles and made a trip to the Home Depot paint aisle for ours.
We purchased sample sizes of 14 different colors and added a copper, silver and gold to the mix!  We even bought a new Filbert camelhair paintbrush for the occasion! (the Filbert style brush is helpful in keeping your sanity as you paint lots and lots of circles)  

After selecting a circle that was three inches in diameter from my stash of circular containers in the kitchen, Benjamin figured that we needed to leave three inches between each circle on the wall, giving us 11 rows of 14 dots!  That totaled 154 dots for me to paint!  

Knowing that we were going to use a chalk line to keep all of the dots straight, Benjamin measured and marked the walls so we would know where to make the lines.  Pulling and holding the chalk line straight is a job that requires two people.  Where the lines intersected, we centered the circle and traced lightly around it.   For the chalk line we used violet marking chalk and it wiped off of the wall with a damp rag.  I was so excited to get starting, I cracked open the first color and was quickly on my way!
You can kinda sorta see the grid and circles if you look really closely.
That night, I knocked out two colors and dreamt about colored dots for the remainder of the night! 
The second best thing about this project (with the first being it was going to create a wall of happiness!) was that it was the perfect activity for nap times.  It took me about twenty minutes to paint one color.  I started out doing ten dots of each color randomly across the wall knowing that I was working with about seventeen different colors.  
After each color was added to the wall I would get more and more excited with how it was turning out!  I would try to paint at least two if not three colors during a nap time.
I squealed with joy when the last dot was painted!  Winston enjoys telling me the colors as he points to them and it really gives the space the pop of color I wanted.  It truly is a happy place to be!

Supplies Needed for This Project
Circular stencil (or potato!)
Tape measure
Chalk line reel 
Dust-a-way chalk {purple}
Paint {Acrylic or semi-gloss enamel}
Paint brushes {Filbert style is best)
Drop cloth {if you're a messy painter!}
Step stool

Cost of this project:
Between $50 and $100!

Sunday, June 29, 2014

Summer Craft: Happy Crab Hand Craft

I think crafts made with a little one's hands and feet are just precious!  They are a great way to document how small {or big!} they are at that point in time.  A great keepsake and or gifts for family members.  The last art piece that Winston made was back in February so we were due up for something new!  One of his favorite books is The Clumsy Crab.  He loves to "read" along and does an outstanding crab impression!  Taking inspiration from his love for crabs and this pin from Pinterest, we took a few afternoons to make our very own Happy Crab Creation!

When making this craft, I wanted Winston to do everything by himself {or with very little assistance from me}.  He was in charge of where to put the glue, the sunshines and the googly eyes.  I had to remind myself to take deep breaths, stay positive, keep it fun and know that sand can be vacuumed from the carpet {since we did this in our craft room}!  I highly advise to put a smock on the kiddo and cover the surface you are using with paper.  

For this craft you will need:
    8 x 10 canvas
    Mod Podge
    Paint Brush
    Small container of sand {we used play sand}
    Painters Tape
    An empty container
    Yellow paint
    A round sponge stamp
    Red Paint
    A paper plate
    A small sponge roller

I placed a strip of painters tape on the canvas, instructed Winston to paint the glue below the yellow and let him go to town.
{Yes, glue got everywhere...hence the smock and the paper!}
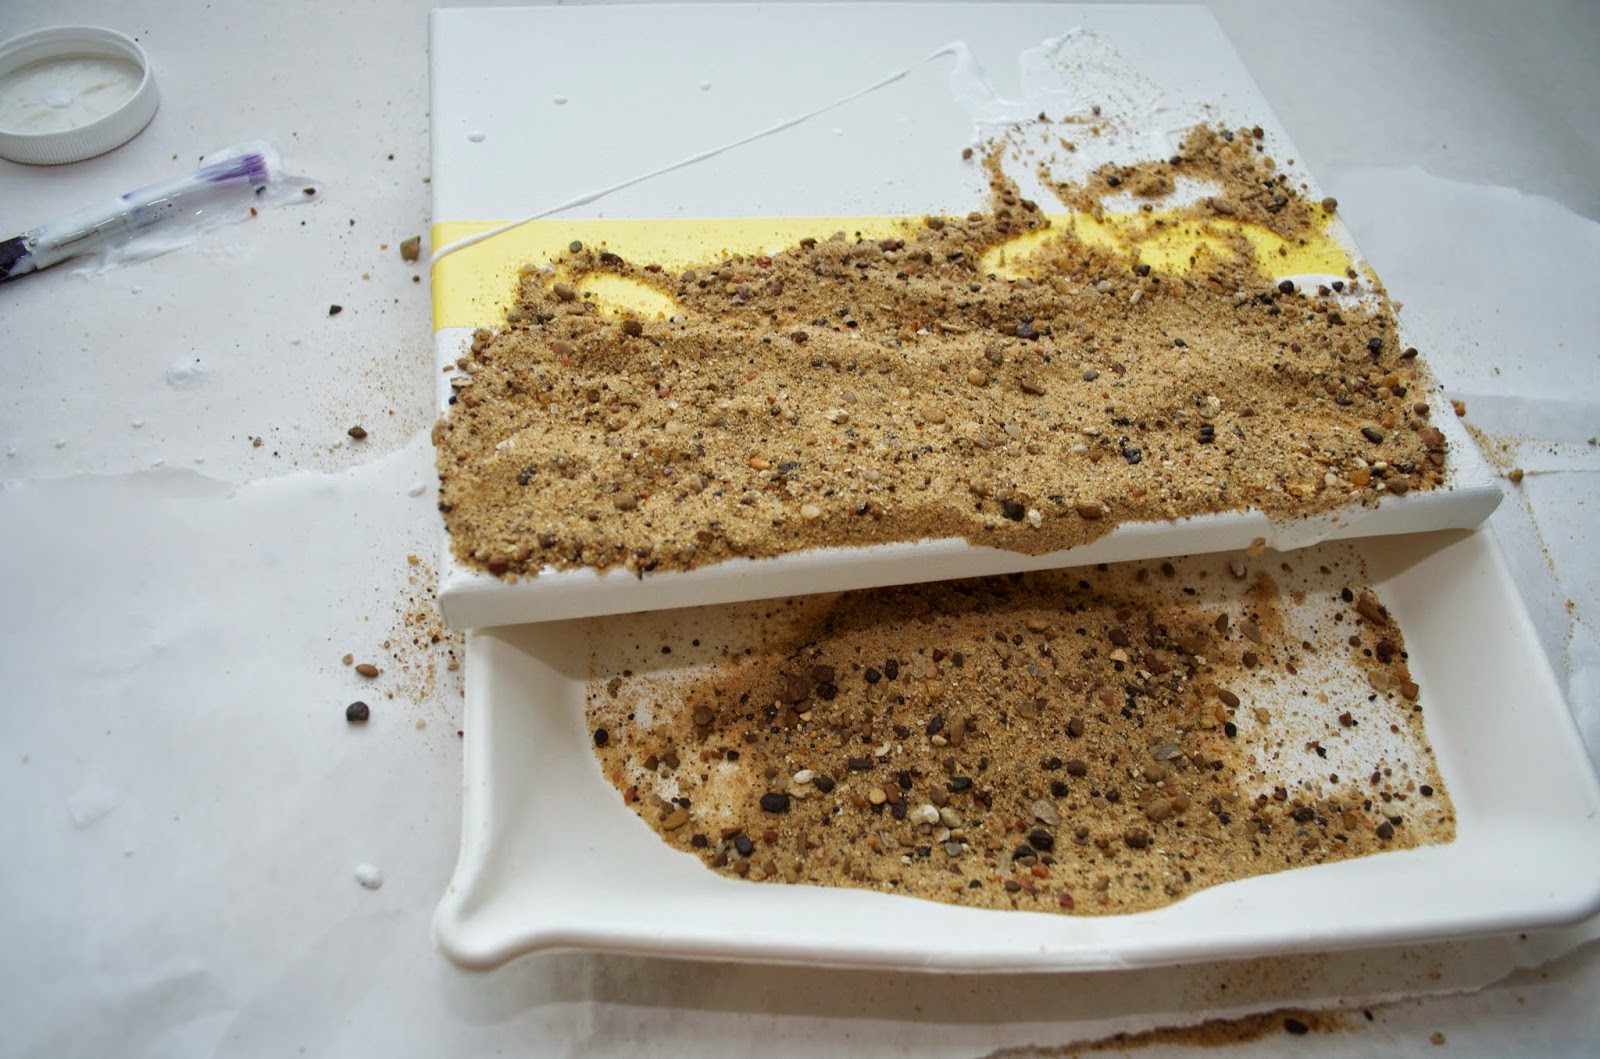
After painting the on the glue, place the canvas over the empty container.  Next, pour the sand onto the glue and spread it around to cover the entire area.
Winston's job was to push the sand out of the bucket onto the canvas.  He did a great job!  {and yes, sand got everywhere.}
 Then he spread the sand around to make sure the area where he had placed glue got covered up.
Lastly, he then helped push the extra sand off of the canvas into the empty container.  {Yes, sand got everywhere!}  Then we left them to dry for a little while. 

The next step is the sun.  Using a 1" round sponge stamper and yellow paint, Winston stamped a sun into the sky on the canvas.  
He had so much fun stamping the canvases, he continued stamping the paper just so that he could use all of the paint! 

Since I didn't want the sand to flake off the canvas, after the sun was dry I took them outside and sprayed the sand with a clear coat sealer.  This guaranteed that the sand would stay in place and it gave the artwork a wet sheen!

In order to make it simple on myself, we did one hand at a time.  Winston loves to give high-fives so when we were ready to lay down his hand we would give the canvas a high-five!  To make sure that the crab would come out vibrantly red, we rolled paint onto his hand after every high-five.  To make the crab, turn the canvas portrait was and place the palm of the hand down with the thumb to the left of the canvas {away from the sand}.  Rotate the canvas 180 degrees and do the same thing with the opposite hand.  You want to make sure you have the palms of the hand prints touching {or as close as you can!}
Winston enjoyed his hands getting rolled and would squish the paint around!
High-five canvas!
Looking more and more like a Happy Crab!
While our handprints were drying, Winston helped me pick out which sized googly eyes he wanted Happy Crab to have.  He picked the largest size I had in my eye arsenal, and placed them on the thumbs once I had glue on them.  He did a fantastic job on all of them!  
I have Nipper, as we have named him, sitting on the counter in the kitchen.  When Winston sees it he stops to make his crab hands!  In allowing Winston to have more ownership {and not micromanaging him} in making this artwork, I realized how proud he was to know that he did it!  Did the vacuum cleaner get a workout?  Did I have messes to clean up afterwards?  Yes!  But, we sure did have a lot of fun!

What about you?  What are your favorite crafts to do with your littles?

All of the items used in the craft can be found at Hobby Lobby or Michaels.
Back to Top